
As part of the Vitrinemedia Light&Play® series, Light&Play® is engineered to deliver dynamic digital content in various environments, including retail windows and indoor displays. It integrates seamlessly with existing Vitrinemedia systems, offering both performance and flexibility.
Installation on cable
Step 1
Turn off the power before any physical manipulation on Light&Play.
Make sure that the cables are well separated by 170 mm. 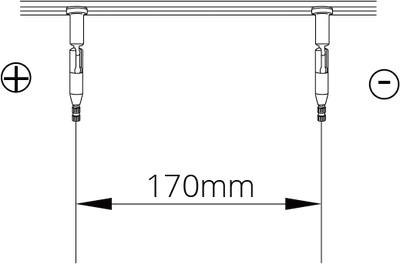
170mm distance between cables is a standard distance on all the Light&Play displays, this standard enables to mix all sizes and orientations.
Step 2
Pass a first cable through the notch provided for this purpose on the Light&Play.
While holding the first cable in its notch, pass the second cable through the second notch of the Light&Play.
The Light&Play is now held by the 2 cables.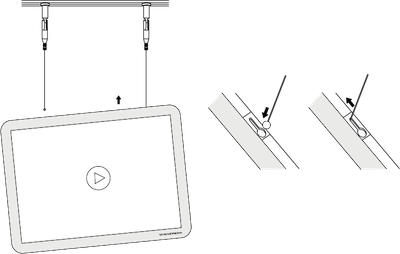
If your Light&Play is in landscape orientation (horizontal), the VITRINEMEDIA logo is then found at the bottom right. If the orientation is portrait (vertical), the VITRINEMEDIA logo is then found at the bottom left.
Step 3
Make sure that the polarity of the cables and the orientation of the Light&Play is respected.
Step 4
You can now turn back the power up and turn on your Light&Play.
Starting and Powering Up
Once the Light&Play has started, playback starts automatically with VM Live by default.
If you need to use VM APP, you will need to change the auto-start app (refer to the following article 👉🏻Choose an automatic launch app)